Saturday 23 March 2013

Great day out - rubbish photos


I went to the "Sewing for Pleasure/Fashion, Embroidery & Stitch/Hobby Crafts" show on Thursday. I have been up to Birmingham NEC by train a couple of times before with friends, but this time I went on my own. I was disproportionately anxious about catching the right train before I went, goodness know why, but of course everything went smoothy. I was at Milton Keynes station a good half an hour before my train was due, and it was blowing a freezing gale along the platform. 
I only gave the Hobby Craft section a quick walk through as I was more interested in the other areas. I did take my little camera, but of course didn't use it very much. What I was here for was supplies I couldn't easily get locally and of course an allowance for a few impulse purchases, no point in going unless you can indulge yourself a bit. 
It is always enlightening visiting the exhibitors' stands rather than the suppliers, and there is always a lot to learn, although I am not very good at taking it all in. I made a bee line for the Kemshalls' stand which was beautifully laid out. It was great to see so many of the quilts and cushions from their web site in real life. I also bought one of their packs of Madeira Lana thread, which I have never seen in a shop.
Bobby Britnell was busy demonstrating on the At Van Go stand. I gave than one a miss as I will be visiting the shop in a few weeks when I have a workshop with Ruth Issett, and a couple of weeks later another one with Bobby.
It is always great to bump into someone you know at these events and when I was photographing the Moor Threads stand, and this display of Bobby Britnell's work I realised that I had met Penny from the group at a AVG workshop.


I enjoyed all of this groups' work.


Other displays of interest were the Jane Austen costumes from a selection of TV and film adaptations of her books.  I couldn't resist a snap of Colin Firth's famous shirt.
Unfortunately he wasn't modelling it!

I then had to snap Jennifer Ehle's dress as she was Mr T's favourite. Can't believe it was 1995 when this  series of Pride and Prejudice was on TV.

So this is what I came home with...

some pretty space dyed fabrics, threads and felt...

...some printed tape, buttons and the Lana thread...

... and some stencils to use on my Gelli plate.

There were a few other bits and pieces - plain thread for dyeing and needles and so on. I know next week there will be something I wish I had got or a stand I had looked more closely at, but so it goes!

We woke to slushy snow this morning, so I am glad I chose to go to Birmingham on Thursday. Hope your weekend is not too bad and fingers crossed that spring will be here soon
Jill


Tuesday 12 March 2013

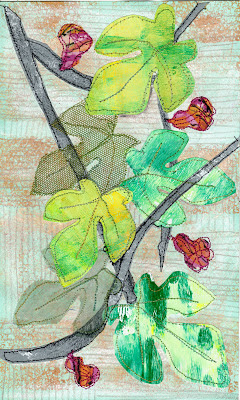
Don't give a fig...

Those of you who follow my blog will know that I have been working on my City and Guilds Creative Quiltmaking course with Linda and Laura Kemshall.  I have now reached my last module and have to make another quilt, this time featuring appliqué work.  I'm not worried about that, but the overall design is my biggest challenge.
I am a figurative artist, I enjoy drawing details and know with perseverance I am a competent draughtswoman. However I want to use a more expressive language in my work, and I am often drawn to semi abstract pieces, so this is my challenge to myself. Part of my studies is to look at contemporary practitioners and here I have chosen two to look at. The first is Stephanie Redfern. She works in paper and fabric, and her pieces are more collage than appliqué. I find the way she treats her subject matter most appealing, especially her pieces based on the natural world. The elements, shapes of leaves, flowers, birds, insects are always recognisable, but she will break down their forms to the edge of abstraction, and her work reflects her energy and passion for her subject matter.

Sketchbook fig studies


The second artist I've looked at is Carol Taylor. She is an American quilt maker with a excellent reputation. You can read about her here on The Textile Blog. Her work is quilt different from Stephanie's as she works in a much more traditional way, but her work is also often abstract. Her Foliage Series uses beautiful leaf shapes and bright colours, always informed by nature, but abstracted.

So without going on any more,  this is what I have been doing. I am using photographs I took at Luton Hoo's Walled garden and glasshouses as my source material, and have been concentration on the fig tree. I have made a couple of collages, making use of the papers I printed with the Gelli plate and others from my stash.
"Three figs"

One of my many photographs.

My second collage, this time incorporating some tulle and organza.

I don't think either of these collages look like Stephanie's or Carol's work, but it has been a really excellent exercise for me, and hopefully a step on my creative path. It is a big step for me not to be too literal, and allow myself artistic license. It is always strange how you can turn a creative corner without even knowing you have got to a junction!


Thursday 7 March 2013

Gelli plate review


Last week I treated myself to a Gelli Arts printing plate. As I'm inexperienced in monoprinting I thought you might like to know how I got on.

The plate is made of a clear gel which is about 1/4 inch thick which is impregnated with a mineral oil.  It is recommended that you use acrylic paint as this cleans off the plate easily.

For my first session I used a mixture of cheap craft acrylics, and tubes of Daler & Rowney System 3 and W&N Galleria acrylics.  All of them performed well. In fact the craft paint was runnier and was easier to apply.

I used paper cut out masks and lifted the paint off the plate in several ways. Using bubble wrap, sequin waste, and by pressing on foam stamps, some of these were home made and others bought.

It was extremely easy to use. You just squeeze a little paint directly onto the plate and roll it out. I used newsprint to take a ghost print which removed most of the paint from the plate with pleasing results.  The plate cleaned really easily, even if the acrylic dried.


Above you can see a plate I made using foam stuck onto a piece of mount board off cut. .Top left I just 'inked' up a square of the gel plate and used the stamp to remove the paint.  I was then able to use the paint on the stamp to take a second print (top right) The bottom stamp was also made using paint I'd lifted from the plate.
Here are a couple more. The right hand one has been drawn into with a white corrector pen.

A couple more 'ghost prints'. Next time I shall use decent paper for this too, as these gave some really exciting results.

These figs were cut from a print made by combing the paint with a card cut with pinking shears. I then washed watercolour over the top. 
I must say the Gelli plate was very easy to use and clean - either with a baby wipe or by spraying it with water and wiping (You can put it under the tap)  It does need treating with respect as I guess it would be easy to damage it with sharp tools. If you just wanted to pull a few prints, it is easy to do without having to set up a big printing session.  I may sound like an advert, but I have read lots of rave reviews so I thought I would add mine.  There is lots of experimenting to do with getting the right quantity of paint on the surface etc, and I was inclined to overprint too heavily, but that is down to my skill not the plate. Hope you find this useful.
Jill

Saturday 2 March 2013

Egyptian Appliqué?

Mr T has this piece of appliqué on the back of the study door for over 20 years!! My husband acquired it when he was helping clear out a props cupboard at the school where he was teaching and rescued it from the bin.  He was told it had been used in a school play many years before that, and presumed one of the teachers had made it. We rather liked it and hung it on the door, which is where it has stayed.  As the door is usually open, I must say I don't notice it any more.


After watching a video about the Tentmakers of Chereh El-Kiamiah and thinking about doing a bit of research for my City and Guilds I thought I'd take a closer look at this piece.  I must say I had not appreciated the workmanship fully, although I remember thinking at the time we got it, that it was a pretty impressive piece of stitching.


I always thought it was sewn onto a piece of hessian, but taking a closer look it is more like coarse linen. It has no backing, but the edge is neatly bound.


The stitches are quite large, but the sections are intricately cut and all are hand turned appliqué with black thread  except for the eagles wings, and some other details which are stitched in white. Although most of the stitching is visible the detail  of the cutting is extraordinary. Some of the appliqué pieces now have holes in them.


I cannot believe that someone did just make this for a school play prop and wonder if it is an old tourist piece from Egypt. I also cannot believe that I have take so little notice of it up to now.

 I wonder what you think. Perhaps you've seen something like it before. I'd love to know.
Jill